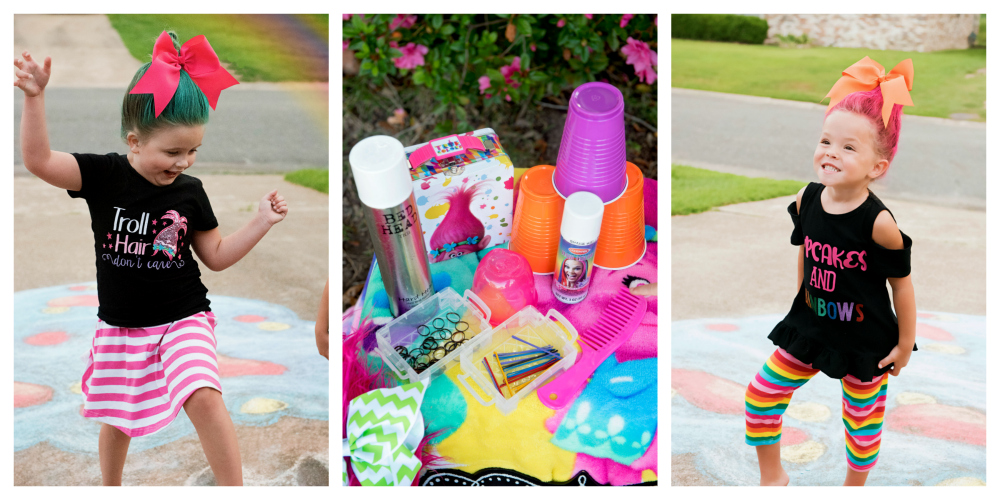
Our photographer Allie is back on the blog with her latest troll hair styling adventures. Allie gets up to some interesting things in the name of getting the shot as The Hair Bow Company photographer! We are so happy to have her sharing her adventures (and lessons learned) here with us! Allie calls her series of posts for us the "Hot Mess Household Blog - A blog dedicated to all of the "Hopeless Pinterest Fail" moms who really try hard, but always come up short in the final creation department!" We think she doesn't give herself enough credit since we absolutely love all the DIY's she's come up with for us and for our photo shoots, but we appreciate the inspiration for all the other "Pinterest Fail Moms" out there!
DIY "Troll Hair, Don't Care"
In under 8 minutes!
Because we want everyone to have Troll Hair, because we care!
I was an 80's baby and went through the entire Troll craze for years in Junior High. Granted, they were not nearly as cute, or had THBC style back then, but the love of Trolls has never left my heart! Several years ago, (Before the new Trolls Revolution), I decided to turn my then 3 year old into one. I was hooked, and thankfully so was she! Since that day, we have shared a love of Trolls, and fun themed photoshoots. When THBC sent all of the Trolls items to be modeled, I was overjoyed! In keeping theme with my "Hot Mess Household, Blog", let me tell you that this is my favorite, because I didn't even "hot mess", much with this one! You just need a couple of items, 8 minutes, and some super cute Troll loving babies and families! Let's get started!
Supplies
1.Can of colored hairspray in your choice of color.
****Note, In earlier photos of my little girl Ava K, she has Hot Pink troll hair. Shortly after that shoot, I found out that she was highly allergic to Red Dye #40, Thankfully she loves every color in the Troll Rainbow now! We used white and blue for current shoots. Please keep colors in mind, and ask before using on other children, to make sure!
2. Small Rubber Hair Bands
3. Crochet headband, from available here at The Hair Bow Company
4. Comb to smooth hair.
5. Bobby pins
6. Extra Hold Hairspray
7. Optional For thinner hair, you can also use a dry shampoo throughout the hair to give it a thicker texture.
8. Plastic cup of any size, depending on hair length, and length you wished to achieve for troll hair.
Let's Do This, Shall We?!

Comb hair until smooth. Part hair at crown, and part over towards the face. Place cup upside down on top of the head. Holding the cup with one hand, scoop the front strip of hair up into an upward sweeping motion. Don't let go, just keep working until you have covered the cup completely with loose hair. Using a small rubber band, gather up the top sprig of hair, located at the bottom of the cup, and tie. We also used a crochet THBC headband to secure the style. You can add your THBC bows, after the hair color dries, like the cheer bow we used in the top photo! I was taking photos, while my assistant Gigi, worked with Ava K and she did amazing on her first try. Don't be afraid to use the hairspray, and bobby pins! It may look messy at first, but you can smooth out later. Once you have your Troll silhouette complete, and to your liking, pull out your colored spray and get busy! I suggest sweeping motions, and doing several coats. Big hair bows, like THBC Texas size bows or our cheer bows are perfect for embellishing this hair style!
That's it! You are ready to Rock out with Branch and Poppy, The Hair Bow Co. Style! Please tag us in your photos! I can’t wait to see!
Resources:
Crochet Headbands available here at The Hair Bow Company.
Cheer Bows available here at The Hair Bow Company.
Photos & tutorial by Allie Barrow of AvaK Photography